Nmap and Zenmap Tutorial: Network Scanning (Educational Lab)
July 27, 2026
Com 0
By Jackson Godwin. Cybersecurity Analyst & Penetration Tester.
Disclaimer Nmap and Zenmap are network scanning tools intended for authorized network administration and educational use only. Unauthorized scanning of networks is illegal. Users are fully responsible for their actions and must ensure compliance with all applicable laws. This tutorial is strictly for educational lab environments.
Nmap is a network mapper that has emerged as one of the most popular and free network discovery tools. Most of the hackers and the pentesters are using this tool for scanning the networks.
About the Nmap Tool
Nmap is a network scanning tool that uses IP packets to identify all devices are connected to the network or the internet. Its choice of hackers who can easily find open ports, which operating systems (OS) you are using, and architectures.
Difference Between Nmap and Zenmap
There is not much difference in both tool; both are open source tools and used for network scanning, but Nmap is a CLI (Command Line) based tool, while Zenmap is a GUI ( Graphical User Interface ) based tool. Both are available on many operating systems, such as Linux, Windows, Mac OS X, etc. The Nmap tool is easy to use for beginners, which has lot of additional features. Nmap is a pre-installed tool in various os such as parrot os and Kali Linux, while Zenmap is not a pre-installed tool; you will have to download form the outside source or official website, so you have to try more as compare Nmap
Installation
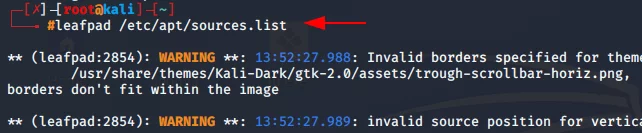
First, we will install Zenmap in our Kali machine, and for this, you have to add the following configuration in sources. list file.
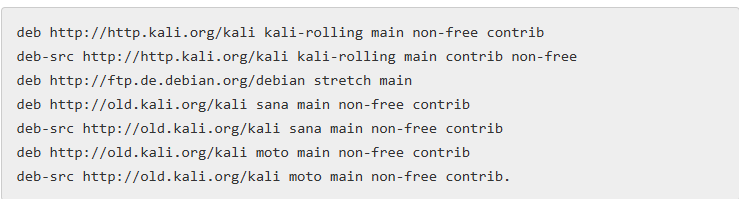
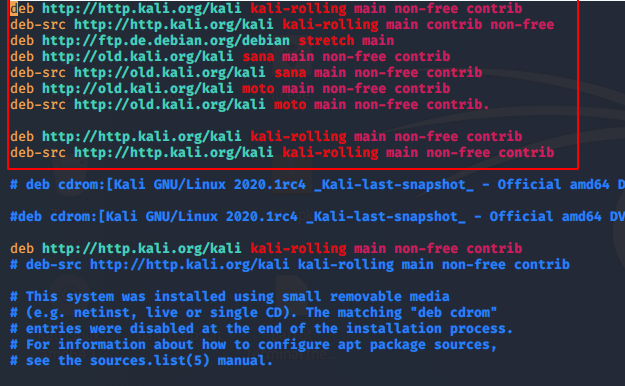
After opening the file, add the source commands as given below.
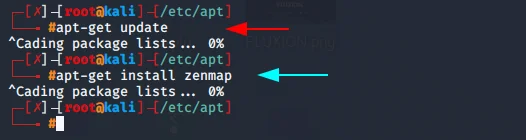
Run the following command to install Zenmap
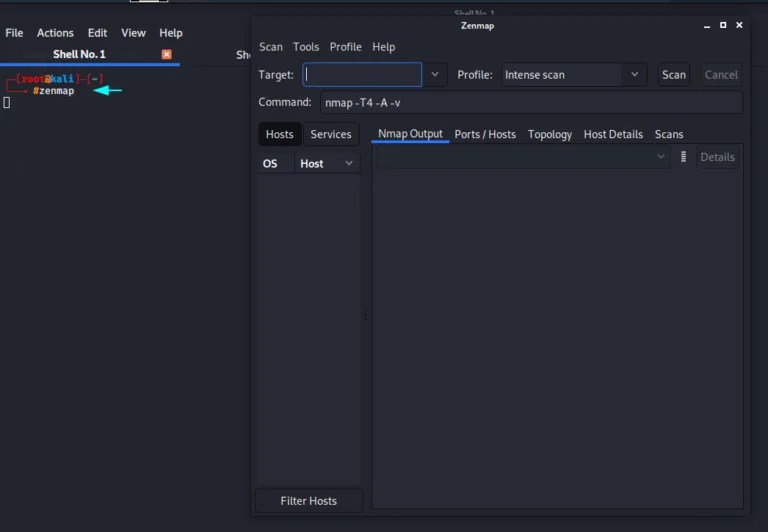
Now you can start your Zenmap tool using the following command.
Let’s take a look as beginners!! 🙂
Host Scan
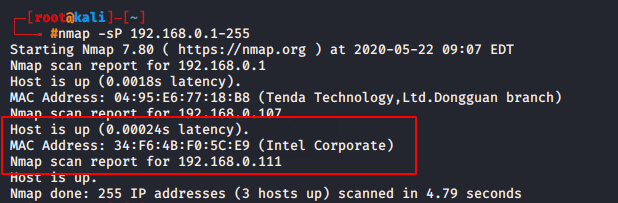
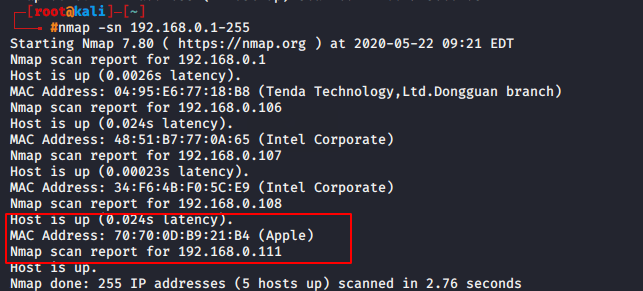
Host scan is used to check how many hosts are active in the network by sending the ARP ( Address Resolution Protocol ) request to all hosts in. 1) nmap -sn <IP range> 2) nmap -sP <IP range>
Simple scan
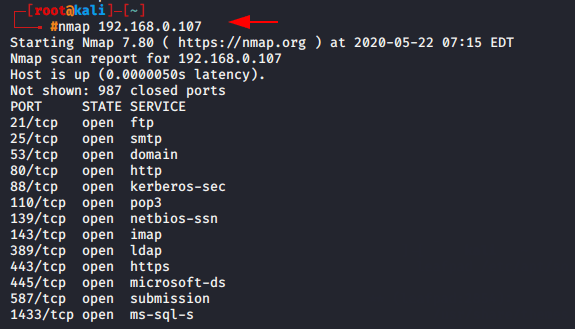
This will tell you the number of TCP/UDP ports open from 1 to 65535. command 🙂 nmap <target>
TCP scan
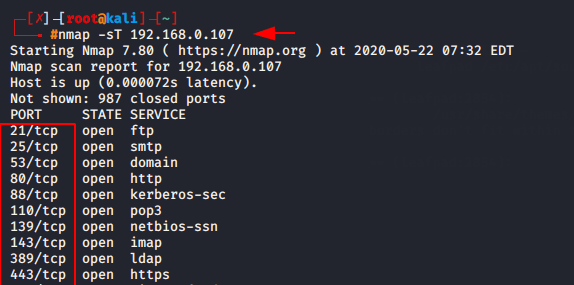
TCP (Transmission Control Protocol) uses a three-way handshake process to establish and maintain a network conversation. If you only want to know about TCP ports, then you can use this command. command 🙂 nmap [Scan TCP] [target IP]
UDP scan
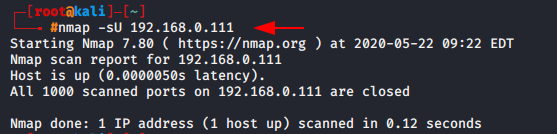
UDP (User Datagram Protocol) is also used for communication or data transmission, but due to unreliable packet delivery and packet drops, it is not widely used. In the testing purpose UDP protocol is used to check the availability of UDP ports. command : ) nmap [scan UDP] [target IP]
OS Detection scan
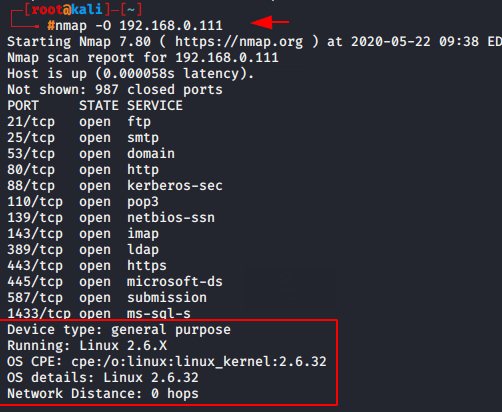
If you want to get information about the operating system of the target machine, so you can add ‘o ’ syntax in your command. command 🙂 nmap [operating system] [target IP]
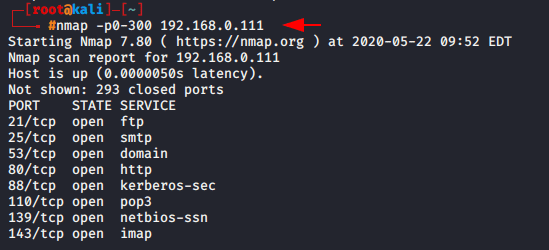
If you suspect that the middle ports may be open, you can set the range of protocols. command 🙂 nmap [range] [target IP]
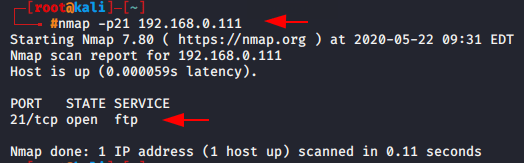
Sometimes we need to scan only a specific port of the target machine. Hence, we can easily scan the particular port by adding ‘-p’ syntax. command 🙂 nmap [port number] [target IP]
Version scan
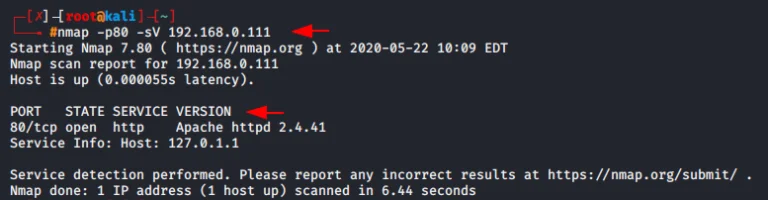
If penetration testers want to test whether the port version is visible, they can use the following command. command 🙂 nmap [scan version] [target IP].
Protocol scan
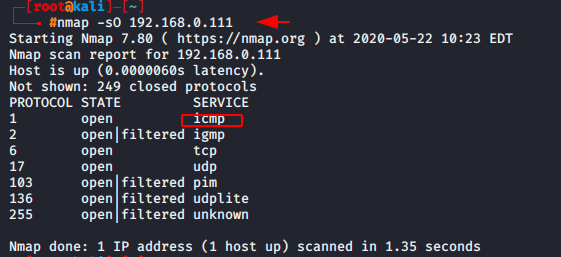
The protocol scan is useful for beginners to determine which ports work on which protocol. command 🙂 nmap [scan protocol] [target IP]
Script scan
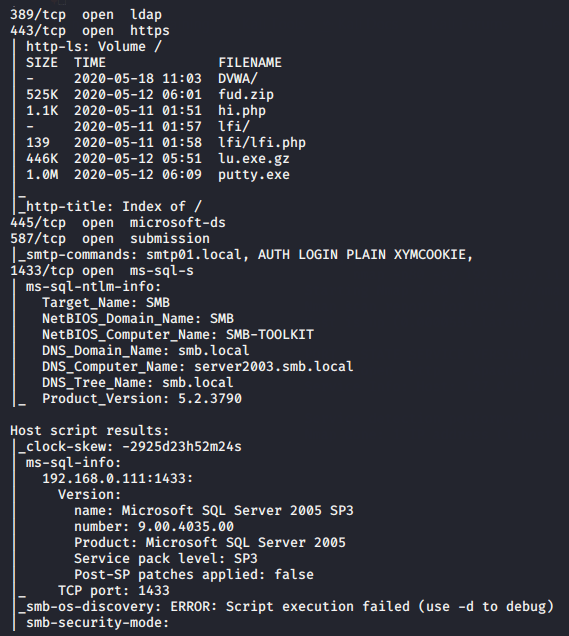
Script scan is an advantage for penetration testers to detect service vulnerabilities, malware threats, and gather more information about it. command 🙂 nmap [script scan] [target IP]
Aggressive Scan
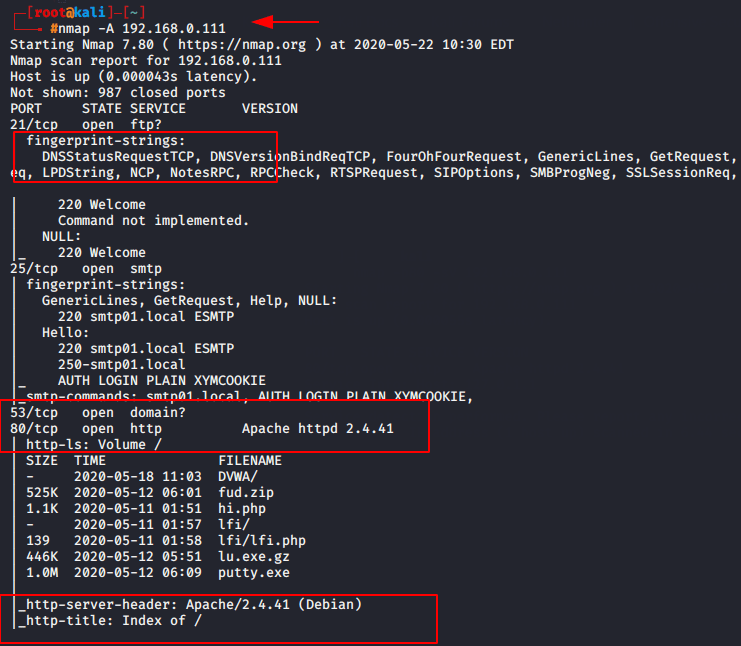
An aggressive scan is time taking scan because it runs four scans at a time, such as :
-O: OS detection -sV: version scanning –sC: script scanning -traceroute: traceroute ( Hopes Count )
commands 🙂 nmap [Aggressive] [target IP]
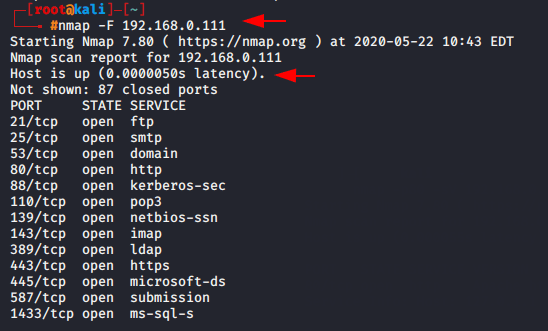
Fast scan
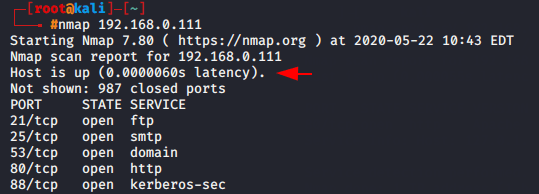
If you are taking this much time to scan the ports, you can go with the fast scan option. As you can see in below, given image, when we execute the normal scan so latency time is 0.00060 sec but when we execute the fast scan, the latency arrives at 0.00050 seconds. command 🙂 nmap [fast sscan] [target IP]
Timing Template Scan
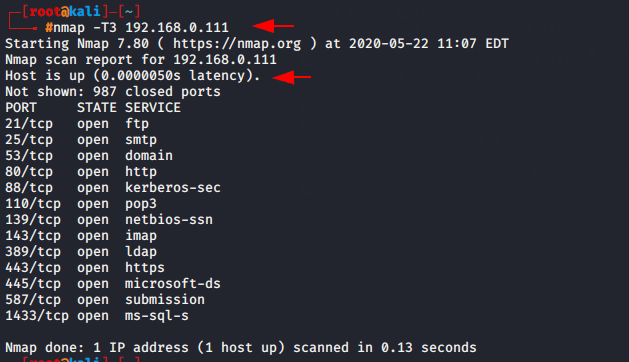
Timing scan is used for reducing the scanning time. Nmap offers six timing templates scan which are known such as :
If you try to use an aggressive scan or insane scan, it will skip some ports, which is a problem with it. In our case, we will choose a normal scan. command 🙂 nmap [-T0, -T1, -T2, -T3, -T4, -T5[ [target IP]
List scan
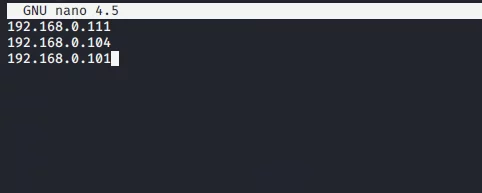
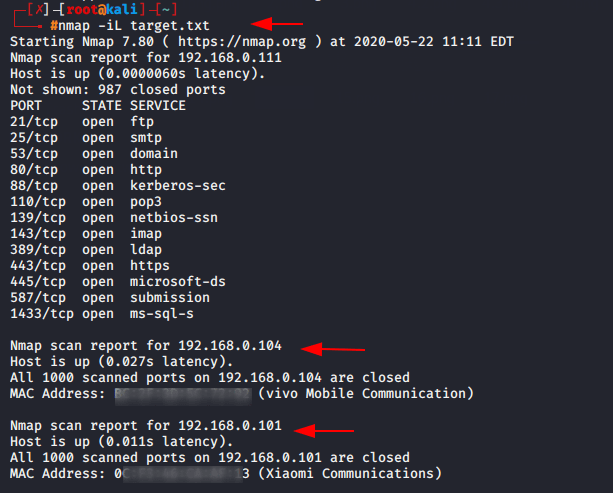
If you want to scan the selected target so you can put the host details, such as IP address, in Txt file
After that, execute the following command to obtain the deep details about the IP address. command : ) nmap [list] [list location]
Output scan
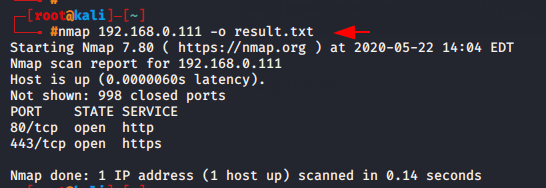
Sometime penetration tester wants to store their outputs in a file so they can use the following commands. command 🙂 nmap [target IP] [-o] [output location]
About the Author
Jackson Godwin is a Cybersecurity Consultant specializing in Vulnerability Assessment and Penetration Testing (VAPT), Governance, Risk and Compliance (GRC), Information Security, and Enterprise Security Assessments. He has experience assessing web applications, banking systems, and enterprise environments to identify security vulnerabilities and improve organizational resilience.
Through JacksonTechnology.com.ng, Jackson shares practical cybersecurity tutorials, penetration testing guides, compliance resources, and career advice to help professionals and businesses strengthen their cybersecurity posture.